As an RC car enthusiast, you know that every detail counts when it comes to maximizing your vehicle’s performance on the track. One crucial factor that can give you a competitive edge is optimizing your motor’s timing. In the early days of RC racing, motor timing adjustments were often overlooked, but as the sport has evolved, racers have realized the significant impact that fine-tuning timing can have on speed, efficiency, and overall performance.
In this comprehensive guide, we’ll dive deep into the world of RC motor timing adjustments, exploring both brushed and brushless motors. We’ll cover the fundamental concepts, tools needed, step-by-step processes, and advanced techniques to help you master the art of motor timing. Whether you’re a seasoned racer looking to squeeze out every ounce of performance or a beginner eager to learn, this guide will provide you with the knowledge and skills to take your RC car to the next level.
Understanding Motor Timing
At its core, motor timing refers to the precise moment when the brushes in a motor make contact with the commutator, which determines when the motor coils are energized. This timing directly impacts how the motor converts electrical energy into mechanical power, influencing the car’s speed, torque, and efficiency.
When you advance the timing, you’re essentially allowing the brushes to make contact with the commutator earlier in the motor’s rotation. This can increase top speed by allowing the motor to generate more power during each rotation. However, advanced timing also leads to increased current draw and heat generation, which can reduce efficiency and potentially damage the motor if taken too far.
On the other hand, retarding the timing means that the brushes make contact with the commutator later in the rotation. This can improve efficiency and reduce heat generation, but at the cost of some top-end speed. Finding the perfect balance between advanced and retarded timing is key to optimizing your RC car’s performance for specific track conditions and racing situations.
Types of Motors
Before we get into the nitty-gritty of motor timing adjustments, let’s take a moment to compare the two main types of motors used in RC cars: brushed and brushless.
Brushed Motors
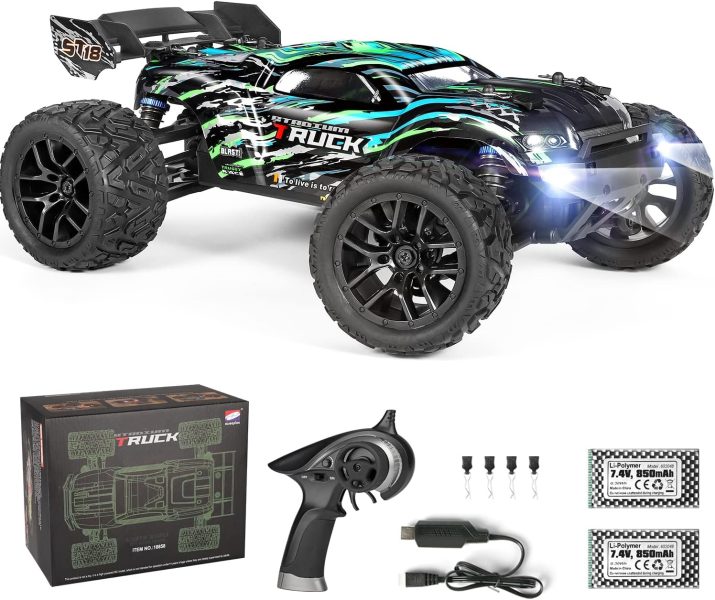
HAIBOXING RC Cars Hailstorm

- This RC Car equipped with powerful 380 brushed motor and Shaft-Driven 4WD to give you 36km/h driving speed, you can drive it on sand, grass, wet mud, swamp, to provide you the realistic racing and off-road game experience. 2.4GHz transmitter with two speed switch, high and low speed switch suffices for both beginners and experienced users to ensure superior control.
Brushed motors have been a staple in RC cars for decades. They use physical brushes to transfer electrical current to the commutator, which then energizes the motor coils. While brushed motors are generally more affordable and easier to maintain, they are less efficient and require more frequent timing adjustments due to brush wear. Brushed motors are often found in entry-level and budget-friendly RC cars.
Brushless Motors
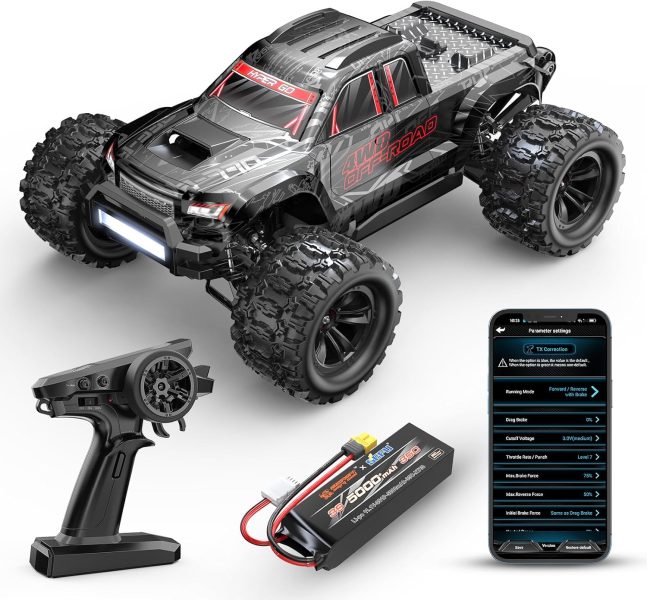
MJX 10208 V2 1/10 RC Trucks

- Hobby 3970 2500kv, brushless motor with metal heatsink and cooling fans design. 100A ESC (compatible 2S/3S/4S battery) and Independent receiver (waterproof case) make this car more potential and upgradeable. 38 mph with the 3S battery and 50 mph with the Angry Snail 4S LIPO battery
In recent years, brushless motors have become increasingly popular in competitive RC racing. These motors feature stationary coils with rotating magnets, and an electronic speed controller (ESC) manages the timing of the coil energization. Brushless motors offer several advantages over their brushed counterparts, including higher efficiency, more power, and reduced maintenance. Timing adjustments on brushless motors are typically made through the ESC settings rather than physical adjustments.
While both brushed and brushless motors can benefit from timing adjustments, the approach and tools needed may differ slightly. As you progress in your RC racing journey, you may find yourself gravitating towards brushless motors for their precision and performance benefits.
Tools Needed for Motor Timing Adjustments
To properly adjust your motor’s timing, you’ll need a few essential tools. Here’s a table outlining the key tools and their purposes:
| Tool | Description | Purpose |
| Timing Gauge | Measures motor timing angles | Ensures precise timing adjustments |
| Motor Analyzer | Tests motor efficiency and power | Monitors performance post-adjustment |
| Screwdrivers | Used to adjust motor screws | Essential for physical timing adjustments |
| Soldering Iron | Used for soldering connections | Necessary for some motor modifications |
| Multimeter | Measures voltage and resistance | Helps diagnose electrical issues |
You can find these tools at your local hobby shop or online retailers specializing in RC car equipment. Investing in high-quality tools will make the timing adjustment process much smoother and more accurate, so don’t be afraid to spend a little extra on reliable gear.
Steps to Adjust Motor Timing
Now that you have the necessary tools, let’s walk through the step-by-step process of adjusting your motor’s timing:
- Safety First: Before you begin, ensure that your workspace is clean, well-lit, and free from distractions. When using a soldering iron or handling small motor parts, take proper safety precautions, such as wearing protective eyewear and ensuring adequate ventilation.
- Determine Your Baseline: Start by measuring your motor’s current timing using a timing gauge. This will give you a reference point to compare against after making adjustments. Make note of the factory timing settings, as this can be helpful if you need to revert to the original configuration.
- Loosen the Motor Screws: Carefully loosen the screws that hold the motor in place, allowing you to rotate the motor can. Be gentle to avoid stripping the screws or damaging the motor mounts.
- Adjust the Timing: Using your timing gauge as a guide, rotate the motor can to advance or retard the timing. As a general rule, rotating the can opposite to the direction of rotation will advance the timing, increasing top speed but decreasing efficiency. Rotating the can in the direction of rotation will retard the timing, improving efficiency but reducing top speed. Make small, incremental adjustments to avoid overloading the motor.
- Tighten the Motor Screws: Once you’ve achieved the desired timing setting, carefully tighten the motor screws to secure the motor in place. Double-check that the screws are snug but not overtightened, as this can cause damage or alignment issues.
- Test and Fine-Tune: With the timing adjusted, reassemble your RC car and head to the track for testing. Monitor the motor’s temperature and overall performance, paying attention to any changes in speed, acceleration, and handling. If necessary, make small additional adjustments until you find the optimal timing setting for your specific setup and racing conditions.
As you go through the adjustment process, it’s essential to keep detailed notes of your changes and their effects on performance. This will help you develop a better understanding of how timing adjustments impact your RC car and make it easier to replicate successful setups in the future.
Optimizing for Speed vs. Efficiency
One of the key decisions you’ll face when adjusting motor timing is whether to prioritize speed or efficiency. The choice ultimately depends on your specific racing goals and the characteristics of the track you’ll be running on.
Advancing the timing will generally increase top speed, allowing your car to reach higher velocities on long straightaways. This can be particularly advantageous in races where raw speed is the primary factor, such as drag racing or high-speed oval track competitions. However, the trade-off for this increased speed is reduced efficiency and potentially higher motor temperatures.
On the other hand, retarding the timing can improve efficiency and reduce heat generation, which can be beneficial in longer races or on technical tracks with tight turns and elevation changes. By sacrificing some top-end speed, you can achieve better throttle response, smoother power delivery, and improved overall consistency.
Here’s a comparison table to help illustrate the trade-offs:
| Timing Adjustment | Effect on Speed | Effect on Efficiency | Impact on Motor Wear |
| Advanced Timing | Increased | Decreased | Higher motor wear |
| Retarded Timing | Decreased | Increased | Lower motor wear |
As an example, let’s say you’re preparing for a race on a long, flat track with few turns. In this scenario, advancing the timing could help you maximize your car’s speed potential, giving you an edge over the competition. However, if you’re racing on a tight, technical course with numerous corners and elevation changes, retarding the timing may provide more controlled handling and improved efficiency, allowing you to maintain a consistent pace throughout the race.
Fine-Tuning for Different Track Conditions
In addition to considering your racing goals, it’s crucial to take track conditions into account when making timing adjustments. Different surfaces and weather conditions can have a significant impact on your car’s performance, and adapting your timing settings accordingly can help you optimize your results.
Surface Type:
- Loose Dirt: On tracks with loose, sandy soil, retarding the timing slightly can improve traction and reduce wheel spin. This allows your car to maintain better grip in the corners and achieve a more consistent speed throughout the race.
- Asphalt: Smooth, high-grip asphalt tracks often reward aggressive driving and higher speeds. In these conditions, advancing the timing can help you take full advantage of the available traction, allowing you to carry more speed through the turns and down the straightaways.
- Clay: As clay tracks develop a slick, polished surface over the course of a race, traction can become a challenge. A slightly retarded timing setting can help maintain grip and prevent the wheels from breaking loose under acceleration, particularly in low-speed corners.
Weather Conditions:
- Wet/Damp: When racing in wet or damp conditions, retarding the timing can help reduce wheel spin and improve overall traction. This is particularly important on slick surfaces where standing water can cause the tires to lose grip unexpectedly.
- High Temperatures: In hot weather, advanced timing settings can exacerbate motor temperature issues. By retarding the timing slightly, you can help keep motor temperatures in check and prevent overheating, which can lead to reduced performance or even motor failure.
Driving Style
Your personal driving style should also factor into your timing adjustments. If you’re an aggressive driver who likes to push the limits and carry maximum speed through the corners, a more advanced timing setting may suit your style. Conversely, if you prefer a smoother, more controlled approach, retarding the timing can help you maintain a consistent pace and avoid overdriving the track.
Advanced Tips for Expert Adjustments
As you gain more experience with motor timing adjustments, you may want to explore some advanced techniques to further optimize your RC car’s performance. Here are a few expert tips to consider:
- On-the-Fly Adjustments: Some high-end brushless ESCs, such as the Tekin RSX Pro or the Castle Creations Mamba X, offer the ability to adjust timing on-the-fly using a programmable interface. This feature allows you to make quick adjustments between heats or during practice sessions to dial in your setup for specific track conditions. For example, let’s say you’re running a Tekin RSX Pro ESC with a Tekin T8 Gen3 motor. Using the Hotwire programming interface, you can connect your ESC to a PC or smartphone and adjust the timing settings in real-time. This allows you to experiment with different timing profiles and immediately see the results on the track, without needing to physically adjust the motor.
- Data Logging: Many modern ESCs also feature built-in data logging capabilities, which can provide valuable insights into your motor’s performance during a race. By analyzing the data collected, you can identify areas where your timing settings may be holding you back and make informed adjustments accordingly. For example, the Castle Creations Mamba Monster X ESC includes a data logging feature that records key metrics such as motor RPM, temperature, and current draw. By reviewing this data after a race, you can spot trends and make targeted timing adjustments to improve performance.
- Motor and ESC Pairing: Choosing a motor and ESC combination that is well-suited to your racing style and the type of track you’ll be running on can make a significant difference in performance. Research and experiment with different pairings to find the optimal setup for your needs. Some popular high-end motor and ESC combos in the RC racing world include the Tekin RSX Pro ESC with the Tekin Redline Gen4 motor, or the Castle Creations Mamba Monster X ESC with the Castle Creations 1717 Sensored Brushless Motor.
Why Invest in a High-Quality Motor and ESC
While it may be tempting to save money by opting for cheaper motors and ESCs, investing in high-quality components can pay off in the long run.
High-end motors and ESCs offer several benefits that can give you a competitive advantage on the track:
- Precision Timing Control: Top-tier ESCs, such as the Tekin RS Pro or the LRP Flow X, often feature advanced timing control options that allow you to make very fine adjustments to optimize performance. This level of precision can be the difference between winning and losing in highly competitive races.
- Durability and Longevity: High-quality motors and ESCs, like those from Tekin, LRP, or Castle Creations, are built to withstand the rigors of competitive racing. They often feature superior materials, advanced cooling systems, and robust construction, which translates to longer lifespans and more consistent performance over time.
- Improved Efficiency: Premium motors and ESCs are often designed with efficiency in mind. They can deliver more power while generating less heat, which can help extend motor life and improve overall performance. For example, the Castle Creations 1717 Sensored Brushless Motor features a high-efficiency stator design that minimizes energy losses and keeps temperatures in check.
While the upfront cost of high-end components may be higher, the long-term benefits in terms of performance, reliability, and competitive edge can make them a worthwhile investment for serious racers.
Troubleshooting Common Motor Timing Issues
Even with careful adjustments and high-quality components, issues can sometimes arise. Here are some common motor timing problems and their potential solutions:
| Problem | Cause | Solution |
| Overheating motor | Timing set too high | Retard timing or improve cooling |
| Loss of power | Timing too retarded | Advance timing gradually |
| Excessive brush wear | Timing too advanced | Retard timing or use a harder brush compound |
| Inconsistent performance | Loose or worn motor bearings | Replace bearings and ensure proper preload |
If you encounter an overheating motor, it’s crucial to address the issue promptly. Excessive heat can cause permanent damage to the motor’s windings and magnets, leading to a significant loss in performance or even complete failure. By retarding the timing, you can help reduce the motor’s current draw and minimize heat generation. Additionally, improving cooling through the use of heat sinks, fans, or vented motor cans can help dissipate excess heat and keep temperatures under control.
Conclusion
Mastering motor timing adjustments is an essential skill for any competitive RC car enthusiast looking to maximize their vehicle’s performance. By understanding the fundamental concepts behind motor timing, using the right tools, and following a systematic approach to adjustments, you can fine-tune your car to suit your specific racing needs and gain a competitive edge on the track.
As you experiment with timing adjustments, remember to consider factors such as track conditions, weather, and your personal driving style. Keep detailed notes of your changes and their effects on performance, and don’t be afraid to learn from both your successes and failures. With practice and persistence, you’ll develop a keen sense for optimizing your motor’s timing and be well on your way to reaching the podium.
To further enhance your understanding and skills, consider investing in high-quality motors and ESCs from reputable brands like Tekin, LRP, or Castle Creations. These components offer precise timing control, durability, and improved efficiency, which can help you get the most out of your timing adjustments.
Remember, mastering motor timing is an ongoing process. As you gain more experience and knowledge, continue to experiment with small adjustments and take notes after each race to fine-tune your performance over time. With dedication and a willingness to learn, you’ll soon be setting new personal bests and leaving your competition in the dust.
So, grab your tools, hit the track, and start exploring the exciting world of RC motor timing adjustments. The road to victory is paved with precise timing, and with the knowledge and skills you’ve gained from this guide, you’re well-equipped to take on the challenge. Happy racing!
Read Other Posts
- RC Car Maintenance Checklist for a Longer Lifespan
- Optimizing Your RC Car’s Differential for Different Terrains: A Comprehensive Guide
- The Ultimate Guide to RC Car Batteries: Lithium-ion vs. LiPo
- The Ultimate Guide to GPS-Enabled RC Cars: Never Lose Your Vehicle Again!
- 3D-Printed RC Car Parts: A Revolution in Customization and Performance
