What is FPV Filming and Why Mount a GoPro on an RC Car? 📹
FPV stands for “First-Person View,” a thrilling way to capture the action as if you were inside the car. By mounting an action camera like a GoPro on your RC vehicle, you get immersive, high-speed footage from the car’s point of view. As one DIY enthusiast notes, “It’s fun to race RC cars…strap a video camera onto them and record all the action from the car’s point of view” instructables.com. This POV perspective makes even casual races look epic on video. FPV footage also provides great B-roll for YouTube or TikTok, showing off jumps, turns, and terrain from the driver’s seat angle. In short, mounting a GoPro on your RC car turns ordinary racing into cinematic content that’s much more exciting to watch.
Which Action Camera Should You Choose for RC Filming? 🔍
GoPro is a top choice for FPV because of its durability and stabilization features. The latest GoPro HERO13 Black (2024) delivers up to 5.3K video at 60fps and “award-winning HyperSmooth 6.0 video stabilization” amazon.com. That means super-smooth footage even on bumpy runs. GoPro cameras are also waterproof and rugged, so a few crashes won’t stop the show. For example, one racer bought two Hero13 cameras (with extra batteries and memory cards) for under $700 risingxedge.com, effectively giving himself a dual-angle rig for less than the cost of many race-specific cameras.
Other action cams like the DJI Osmo Action 4 (4K120) or Insta360 ONE X3 (360° capture) can also work well. The Osmo Action 4, for instance, has dual screens and quick recharge, and Insta360 cameras let you reframe the shot in post-production. However, GoPro’s wide ecosystem and proven track record in motorsports often make it the easy pick. When choosing, look for these key features in any action camera:
- Video Quality: 4K or higher, at 60fps or more, for fluid slow-motion.
- Stabilization: Built-in gyro stabilization (like HyperSmooth or DJI RockSteady) to reduce shake.
- Battery Life: Long runtime or swappable batteries, since filming eats power.
- Weight and Size: Lighter cameras are easier to mount and cause less drag.
Question: What features matter most in an action camera for RC? Ideally, a wide field-of-view (FOV) lens, image stabilization, and good low-light performance. GoPro Hero cameras balance these well. For example, Hero13’s new Enduro battery promises longer recording in cold weather.
Mounting Options: Body Shell vs Roll Cage vs Chassis 🛠️
Deciding where to attach your camera is crucial. The mount’s location affects stability, angle, and even safety of the camera. Common options include:
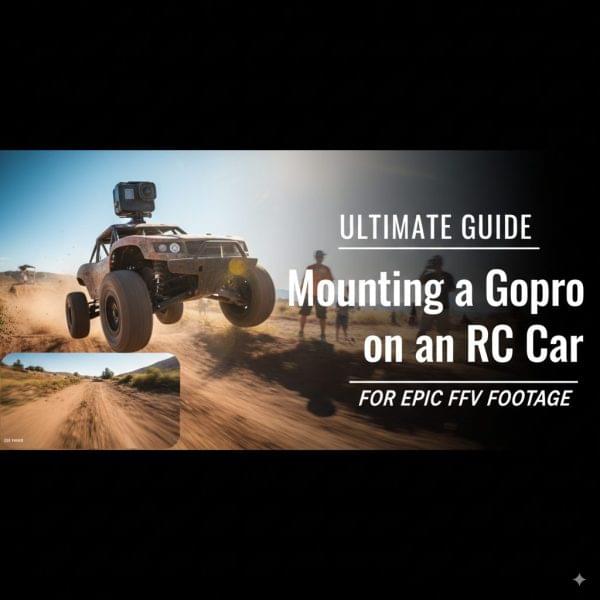
- Front Bumper or Hood Mount: Attaching the GoPro to the car’s front bumper or hood gives a driver’s-eye view. This is how many POV videos are shot. It’s straightforward if the bumper is flat or removable. You may need to drill holes or use strong tape/Velcro. The instructables project above actually replaced the front bumper with a custom 3D-printed piece to hold a GoPro. The advantage is a clear forward view, but the downside is more vibration and risk of collision. Always secure it tightly and consider padding (foam or bubble wrap) to dampen shakes. Image: A GoPro action camera mounted on the front bumper of an RC racing buggy (for First-Person-View footage). Mount the camera securely, and add foam padding behind it to dampen vibration.
- Roll Cage or Frame Mount: If your RC car has a roll cage, bumper hoop, or roll bar (common on off-road trucks and buggies), you can clamp the camera there. This tends to be more stable and protects the camera in a crash. For example, the N-R 360° Roll Bar Mount for GoPro clamps around 1.75–2″ bars and holds the GoPro firm. It’s made of “high-quality aluminum alloy” and offers full 360° rotation amazon.com, so you can aim your shot just right. We recommend these clamp-style mounts (often called bar mounts or roll-cage mounts) for rugged stability.
- Roof or Body Shell Mount: Another option is on the car’s roof or upper shell. Many RC bodies have flat roof sections where you can use a strap clamp or sticky pad. This location is more central and lower to the ground, giving an immersive feel. However, be careful: a crash or flip could smash the camera. Always use a protective housing or case (see below) if mounting outside the shell.
- Chassis or Rear Mount: You can also mount under the chassis or at the rear of the car. This is less common for POV, but can give interesting angles (like wheel-level or chasing view). For example, the instructables project added a rear cam by attaching a mount to a small plastic cage at the back of the car, held on with zip-ties. This captured “third-person” shots of the car itself for a video-game effect.
Real-life example: One hobbyist attached a GoPro to a 3D-printed front bumper on their RadioShack RC car. They used Gorilla tape and added bubble-wrap padding to isolate vibrations. The result (shown above) was a clear front view even at speed. Later, they secured the same camera to the rear roll cage using zip-ties for behind shots.
DIY vs. Pre-made Mounts: What’s Right for You? ⚙️
DIY Mounts: Making your own mount can be fun and cheap. Options include:
- Tape/Velcro/Padding: For a quick solution, stick the camera base to the car using strong double-sided tape or Velcro straps. Wrap some foam or bubble wrap around the camera housing to cushion impacts.
- 3D Printed Brackets: If you have a 3D printer or know someone who does, you can design custom mounts. The example above printed a whole new bumper with a GoPro slot. Another example might be a simple bracket that attaches to existing posts on the chassis. Check Thingiverse or RC forums for printable designs.
- Clamps and Zip Ties: A robust DIY trick is to make a clamp from sheet plastic or metal and secure it with zip-ties. The creator of our sample project zip-tied a mount to the back cage and stuffed it with bubble wrap to absorb shocks.
The benefit of DIY is custom fit: you tailor it to your specific car. The downside is it takes more time and trial & error, and may lack professional polish. Make sure any homemade mount is rock-solid before a big run.
Pre-made Mounts: There are many off-the-shelf mounts designed for GoPro and similar cameras:
- Suction Cup Mounts: These attach to smooth surfaces (like glass or plastic). For RC cars, a windshield or smooth canopy might work. One popular choice is the Suptig Suction Cup Mount, which fits GoPro HERO cameras from 1 through 13 amazon.com. It features an 85mm rubber cup and adjustable joints, letting you stick the camera to a flat spot and swivel it 180°. These are great for quick setup, but be aware: they can fall off in rough terrain if not stuck to a perfectly clean surface. Always test suction before driving.
- Roll Cage/Bar Clamps: As mentioned above, clamps like the N-R or the Tackform Enduro series clamp around tubes. They’re sturdy and reusable. For instance, the N-R UTV/ATV 360° camera mount (Amazon’s Choice) “allows you to easily loosen or tighten the mount without tools” and supports vertical or horizontal angles.
- Adhesive Mount Kits: GoPro sells flat and curved adhesive mounts that stick permanently. For RC use, a flat adhesive can adhere to a flat chassis or shell surface, while a curved mount grips roll bars. Consider the GoPro Curved + Flat Mount Kit (set of 3). These official mounts use “industrial-strength adhesive” so they stay put on driving surfaces amazon.com, yet can be removed later with a heat gun if needed. They come with quick-release buckles, so you can easily snap the camera on and off the same base.
- Flex Clamps and Other Accessories: Other handy mounts include flexible arm clamps (like Neewer or Puluz brands) and even magnetic mounts for metal parts. A “magic arm” clamp can screw into a GoPro tripod mount and clamp to various spots. While not all are RC-specific, any mount with the standard 1/4″-20 thread adapter can work. For example, PULUZ suction/magnetic mounts let you either stick or clamp the camera virtually anywhere.
Which to choose? If you want reliability and minimal setup, a pre-made clamp or adhesive kit is smart. For hobbyists who like tinkering, a custom DIY solution adds personalization. In either case, always pad the camera (foam or Sorbothane rubber) to dampen vibration – even a small buffer can greatly reduce shake and image blur.
How to Install Your GoPro: Step-by-Step 🛡️
- Plan the Mount Location. Decide where to attach the camera. Consider sight-lines and stability. For a front view, a flat bumper or hood is good; for a forward angle, maybe the shell roof; for following shots, the rear cage. Clean the surface if you’re using adhesive.
- Attach the Mount. If using an adhesive, stick it firmly and let it set (often 24 hours before use). For clamps, fit them tightly around the roll bars or frame. Use zip-ties or bolts as needed. If 3D-printing, make sure the bracket matches the chassis dimensions.
- Mount the Camera. Screw the GoPro onto the mount base (use the thumbscrew!). Check angle – you might want it slightly angled down to capture more of the ground. Remember to turn the camera on and test its view before making final adjustments. Tighten all screws or clamps securely.
- Add Vibration Dampening. Insert small foam pads or rubber between the camera housing and the mount if possible. In our example, the builder stuffed bubble wrap behind the camera for both front and rear mounts. Even adhesive gel pads or silicone bumpers can help absorb shocks.
- Test Before Racing. Power up the camera and do a slow “shakedown” run. Look at the live view (if available) or record a short clip to ensure the camera stays put. Watch for any wobble – if it’s loose, tighten it. Also, ensure the battery cover and lens are locked so no dirt or water gets in.
- Protect the Gear. Consider a hard case or shell for the GoPro if you expect crashes. For example, GoPro’s own Waterproof Protective Housing (fits HERO9-13) seals the camera in a tough plastic shell. This can prevent damage and moisture ingress during bashing. If not using the waterproof case, at least use a simple lens cover and be extra careful.
Filming Tips for Stable FPV Footage 🎥
Once your GoPro is mounted, keep these tips in mind to maximize video quality:
- Enable Stabilization: Use your camera’s stabilization mode. For GoPros, turn on HyperSmooth (preferably 5.0 or 6.0). This electronic stabilization uses the gyro to smooth out bumps. If your mount is very rigid and the car is well-damped, you can experiment with lower HyperSmooth settings or off (some racers prefer it off to avoid “swishy” cropping, but for casual use it helps a lot).
- Frame Rate and Resolution: For fast RC runs, 4K at 60fps or 2.7K at 120fps gives smooth slow-motion when you slow down in editing. In bright outdoor daylight, higher frame rates help catch detail. If light is low (e.g. cloudy or dusk), lower the frame rate to 60fps to allow more light per frame. Set the FOV to Wide or SuperView for an action-packed wide angle.
- Camera Settings: Many racers lock settings: set ISO limit to 800, shutter on Auto, exposure compensation to -0.5 or -1 to avoid overexposure in sunlight. Turn off any screen overlays and set a fixed white balance if your cam allows, so color doesn’t jump around. If your GoPro supports it, use Linear FOV (to remove fisheye) for a more natural perspective.
- Mount Orientation: Small adjustments can make a big difference. Tilt the camera slightly downwards to capture the track ahead (avoid too much sky). Make sure it points straight – even a 5° yaw error can make the car race off-center in frame.
- GoPro Quik Preview: Use the GoPro Quik app on your phone to check the angle before you run. This saves trial-and-error.
- Capturing B-Roll: Aside from FPV, mount the camera on a tripod or clamp (outside the car) to shoot static shots of the car rolling by or doing donuts. This B-roll footage, cut in between POV clips, makes your video much more engaging.
- Safety First: Never look away from driving the RC at high speed. If you need to adjust the GoPro or check settings, stop the car first. Disconnect and move the car to a safe spot before fiddling with cables or mounts.
Editing Your FPV Video: Simple Tips ✂️
After filming, use basic editing to make the footage pop:
- Trim the Fat: Remove long straightaways or starts/stops. Keep the action tight. A 2-minute video of nonstop jumps and turns is better than 10 minutes of slow driving.
- Add Music and Sound: Choose upbeat royalty-free music that matches the speed of your driving. Sync cuts to beats (many free editors have auto-beat-detect). Keep original motor sound for authenticity, but duck it under the music if it’s too loud or whiny.
- Use Simple Effects: A little text overlay (“FPV Run #1”) or speed overlay (if you logged speed with GPS) can look cool. Avoid overuse of 3D zooms or filters – the footage should look natural.
- GoPro Quick or Free Software: GoPro’s own Quik app (mobile/desktop) makes editing easy: it auto-trims to music and adds transitions. Otherwise, free tools like DaVinci Resolve, iMovie, or HitFilm Express work well. They let you stabilize footage further, color-correct, and add slow-motion.
- Show Variety: If you captured rear or third-person shots (like the behind-car cam), intersperse those. Maybe do a split-screen or picture-in-picture (PIP) with a map of your track. The variety keeps viewers hooked.
- Export in High Quality: Finalize your video in at least 1080p (1920×1080) or even 1440p/4K for sharpness. Many social platforms now support 4K. Use MP4/H.264 or H.265 codecs for compatibility.
Conclusion & Take Action! 🏁
Mounting a GoPro on your RC car opens up a whole new world of filmmaking. You get to relive the thrill of racing from the cockpit view and share it with others. We covered choosing the camera, finding the right mount, installation, and shooting tips – all you need to get started.
Ready to capture your next FPV racing video? Share your first footage with the community, and subscribe to our YouTube channel for more tips on RC filming and racing! If you found this guide helpful, let us know in the comments. And don’t forget to check out recommended gear, like the GoPro HERO13 Black camera and reliable mounts (e.g. N-R 360° Roll Bar Clamp, Suptig Suction Cup, GoPro Adhesive Mount Kit, GoPro Protective Case). These products (highly rated by users) will help ensure your camera stays secure and you get the best footage.
Now grab your gear, hit the track, and have fun shooting epic RC car videos – we can’t wait to see what you film!
Sources: Expert guides and reviews on RC FPV filming and mounts.