Ever dreamed of building your own underwater robot or remote-controlled boat? You’re about to embark on an exciting journey! Whether you’re a weekend hobbyist or a serious developer, this comprehensive guide will help you navigate the fascinating world of underwater thrusters.
🤔 What Exactly is an Underwater Thruster?
Think of it as your aquatic project’s powerhouse! An underwater thruster is essentially a waterproof propeller system that gives your vessel its muscle. Just like a boat’s motor or a submarine’s propulsion system, these compact powerhouses let you control movement in any direction with impressive precision.
🎯 Choosing Your Perfect Thruster: The Ultimate Comparison
Let’s break down the most popular options available in 2024:
| Model Class | Voltage | Max Thrust | Load Capacity | Speed | Best For | Environment |
| Entry-Level (BM70) | 8.4V | 0.4kg | Small boats up to 55cm | Variable | Beginner projects | Fresh/Salt Water |
| Mid-Range (U2) | 16V | 3.4kg | Up to 100kg | 1-3 km/h | Medium ROVs | Fresh/Salt Water |
| Professional (U5) | 24V | 14kg | Up to 250kg | 7-12 km/h | Large vessels | Freshwater only |
| Commercial (U92) | 24V | 18.4kg | Up to 350kg | 7-12 km/h | Heavy-duty projects | Fresh/Salt Water |
Key Features You Need to Consider 🔑
1. Thrust Power
- Entry-Level: 0.4-3.4kg (perfect for beginners)
- Mid-Range: 3.5-14kg (ideal for most projects)
- Professional: 14kg+ (when you need serious power)
2. Operating Environment
- ✅ Freshwater Only: Lower cost, simpler maintenance
- ✅ Fresh/Saltwater: More versatile, requires better corrosion resistance
3. Waterproofing
- Depth Rating: Most operate safely up to 50 meters
- IP Rating: Look for IP68 for full submersion protection
🔄 Brushed vs. Brushless: The Great Debate
Brushed Motors
Advantages:
- 💰 More affordable
- 🔧 Simpler to operate and repair
- 📚 Perfect for learning
- 🛠️ Easy to wire and control
Disadvantages:
- ⚡ Lower efficiency
- 🔨 More frequent maintenance
- ⏰ Shorter lifespan
Brushless Motors
Advantages:
- ⚡ Higher efficiency (up to 85-95%)
- 🏃♂️ Better performance
- ⏰ Longer lifespan
- 🌡️ Better heat management
Disadvantages:
- 💰 Higher initial cost
- 🔧 More complex control systems
- 📚 Steeper learning curve
🛠️ Ultimate Installation Guide
Essential Tools & Materials Checklist
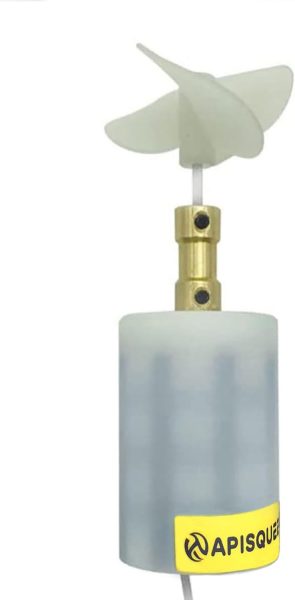
2S Lipo 8.4V 22W BM70 Brushed Submarine Thruster

- BM70 adopts a new waterproof process,waterproof level IP68,suitable for all kinds of environments.
- adopt 2-2mm coupling,convenient for users to replace the propeller;No positive and negative distinction,motor line and power line positive and negative arbitrary connection,if the wiring after the wrong turn,the two lines can be switched to the positive and negative battery.
Basic Tools:
- Phillips and flathead screwdrivers (multiple sizes)
- Adjustable wrench set (6-inch and 8-inch recommended)
- Wire strippers and crimpers
- Electric drill with various bits
- Digital multimeter for testing
- Level and measuring tape
- Pencil/waterproof marker
Installation Materials:
- Marine-grade wiring (appropriate gauge)
- Waterproof connectors and heat shrink tubing
- Liquid electrical tape
- Marine-grade sealant
- Cable ties (UV resistant)
- Mounting hardware (stainless steel recommended)
- Electrical tape
- Thread-locking compound
Safety Equipment:
- Safety glasses
- Work gloves
- Dust mask
- First aid kit
- Fire extinguisher (for electrical fires)
Detailed Step-by-Step Installation
1. Planning Phase 📋 Time Required: 1-2 hours
Location Planning:
- Draw a detailed diagram of your vessel
- Mark optimal thruster positions:
- Minimum 2 inches below waterline
- Away from sensors and antennas
- Clear of hull curves and joints
Power Planning:
- Calculate total power requirements:
- Running amperage × operating voltage
- Add 20% safety margin
Wiring Route:
- Map shortest path from battery to thruster
- Identify potential chafing points
- Plan cable protection methods
PRO TIP: Take photos of your vessel from multiple angles before starting. These will be invaluable for reference.
2. Mounting Preparation 🔨 Time Required: 2-3 hours Surface Preparation:
For Different Materials:
- Wood: Sand and seal area
- Fiberglass: Clean with acetone
- Metal: Remove any corrosion
Drilling Process:
- Cover the drilling area with masking tape
- Create a template using a mounting bracket
- Mark hole centers precisely
- Drill pilot holes:
- Wood: Start with 1/8″, then size up
- Fiberglass: Use step bit slowly
- Metal: Start small, use cutting oil
Mounting Considerations:
- Apply marine sealant around holes
- Use a backing plate for added strength
- Install rubber gaskets to reduce vibration
SAFETY TIP: Always wear eye protection and use sharp, appropriate-sized drill bits.
3. Wiring Installation 🔌 Time Required: 3-4 hours Wire Selection Guide:
Distance vs. Gauge Requirements:
- Up to 6 feet: Standard gauge
- 6-10 feet: Go one size larger
- 10+ feet: Go two sizes larger
Amperage Requirements:
- Up to 5A: 18 AWG
- 5-10A: 16 AWG
- 10-20A: 14 AWG • 20-30A: 12 AWG
Connection Process:
Run cables:
- Leave 20% extra length for service loops
- Secure every 12 inches
- Protect at all passage points
Make connections:
- Strip wires carefully (no nicked conductors)
- Use marine-grade butt connectors
- Double-crimp each connection
- Heat shrinks all connections
Waterproofing:
- Apply liquid electrical tape
- Add secondary heat shrink layer
- Seal all junction points
CRITICAL: Label all wires before installation:
- Use waterproof labels
- Mark both ends
- Include voltage and polarity
PRO TIP: Create a detailed wiring diagram and take photos of all connections.
4. Testing Protocol 🧪 Time Required: 2-3 hours Initial Dry Testing:
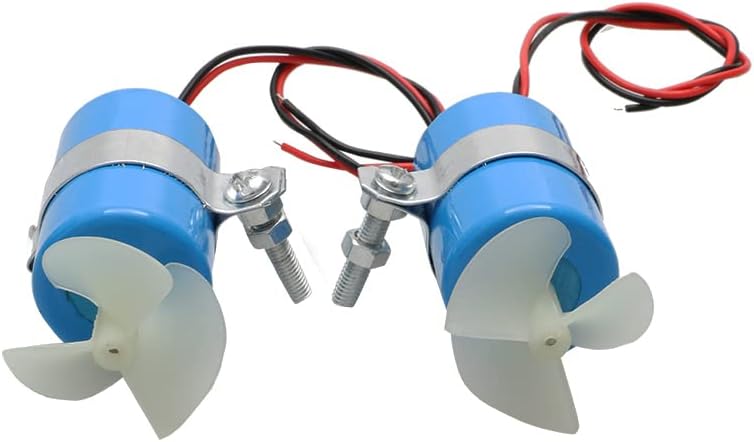
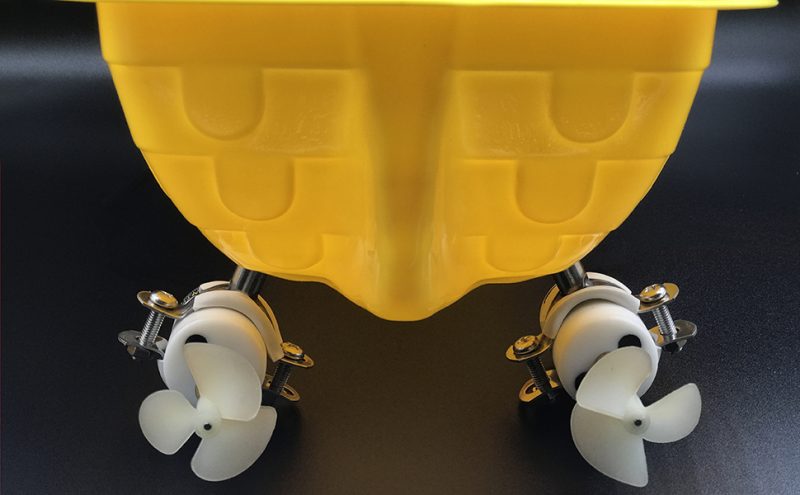
Lubosi RC Jet Boat Underwater Motor Thruster

- Package Includes: 1pcs x Positive Thruster | or | 1pcs x Negative Thruster | or | 1pair x Thruster ( 1pair = 1pcs positive + 1pcs negative )
- It can be used for modification, remote control boat, nest , pull net boat, remote control submarine, miniature underwater robot
- Hull length:50mm
- Diameter:31mm
Basic Power Test (2-3 seconds)
- Verify rotation direction
- Check for unusual sounds
- Monitor for vibrations
System Check
- Measure voltage at thruster
- Check amperage draw
- Verify control response
Shallow Water Testing:
Static Test (30 seconds)
- Monitor for leaks
- Check seal integrity
- Observe the water flow pattern
Dynamic Test (5 minutes)
Power Level Sequence:
- 25% power – 1 minute
- 50% power – 2 minutes
- 75% power – 1 minute
- 100% power – 1 minute
Full Operation Test:
- Run all directional controls
- Test emergency stop
- Monitor temperature
- Check for vibrations
DATA LOGGING: Record these measurements:
- Operating voltage
- Current draw
- Temperature
- Vibration levels
- Any unusual sounds
5. Final Checks ✅ Time Required: 1-hour Mechanical Checklist:
- All mounting bolts torqued correctly
- Propeller rotates freely
- No loose components
- Proper alignment verified
Electrical Checklist:
- All connections secure
- Proper voltage at thruster
- Control system responding
- Emergency stop functioning
Documentation:
- Take “as-built” photos
- Record all settings
- Note any modifications
- Create a maintenance schedule
Installation Best Practices 🌟
Environment Considerations:
- Install in clean, dry conditions
- Temperature between 60-80°F (15-27°C)
- Good lighting essential
- Clean workspace required
Time Management:
- Don’t rush the installation
- Plan for breaks to avoid fatigue
- Double-check all steps
- Have a helper when possible
Common Installation Pitfalls to Avoid:
❌ Don’t skip the planning phase
❌ Never use non-marine grade components
❌ Avoid mounting too close to surfaces
❌ Don’t forget strain relief on cables
❌ Never skip testing steps
Emergency Procedures:
- Know location of:
- Main power disconnect
- Fire extinguisher
- First aid kit
- Have emergency contacts ready
- Keep a basic repair kit nearby
🔧 Troubleshooting Like a Pro
| Issue | Possible Causes | Quick Fixes | Prevention |
| No Movement | • Dead battery • Loose wiring • Controller issue | • Check connections • Verify power source • Test controller | Regular maintenance checks |
| Weak Thrust | • Damaged prop • Low voltage • Debris | • Clean propeller • Check battery • Inspect for damage | Regular cleaning |
| Water Leaks | • Damaged seals • Loose fittings | • Replace seals • Tighten connections | Periodic seal inspection |
| Strange Noise | • Prop damage • Bearing issues | • Check alignment • Clean thoroughly | Regular inspections |
💡 Pro Tips for Success
- Environment Matters
- Rinse after saltwater use
- Check seals monthly
- Store in dry conditions
- Power Management
- Use appropriate batteries
- Monitor voltage levels
- Consider backup power
- Maintenance Schedule
- Weekly: Visual inspection
- Monthly: Seal Check
- Quarterly: Deep clean
- Yearly: Complete overhaul
🎓 Next Steps
- Define Your Project:
- Set clear goals
- List requirements
- Establish budget
- Choose Your Setup:
- Select thruster type
- Gather materials
- Plan installation
- Get Started:
- Follow installation guide
- Run test sequence
- Document progress
🌟 Conclusion
Choosing and installing the right underwater thruster doesn’t have to be overwhelming. Start with your project requirements, consider your environment, and pick a solution that matches your skill level. Remember: it’s better to start small and upgrade later than to get overwhelmed with too much power initially.
📝 Quick Checklist Before You Start:
- Project requirements defined
- Environment conditions considered
- Power needs calculated
- Tools and materials gathered
- Installation plan created
- Safety measures in place
Happy building! 🚀
Remember to always follow local regulations and safety guidelines when operating underwater vehicles.
Read Other Posts
- Unleash Aquatic Mischief with the Gator-Head Water Rover!
- Roar into Action: Dino-Themed RC Cars with LED Lights and Music
- Why RC Kayaks Are the Future of Kids’ Water Play
- Mastering the Waves: The Ultimate Guide to High-Speed Remote Watercraft
- Remote Controlled Boat with Water Spray and LED Lights – The Ultimate Fun on Water!
